Privacy statement: Your privacy is very important to Us. Our company promises not to disclose your personal information to any external company with out your explicit permission.
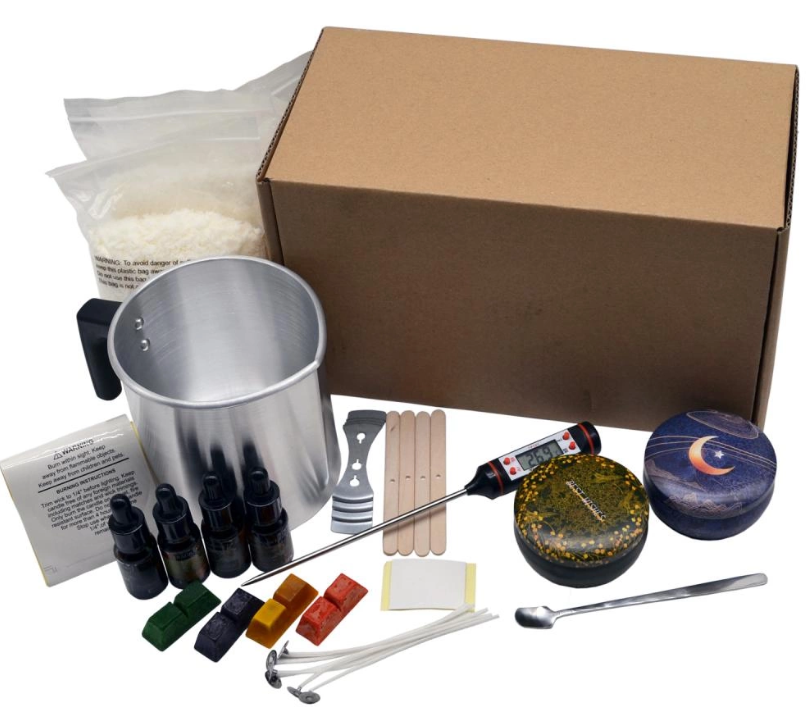
2. Gather your supplies. In addition to wax, you'll also need a Candle Making Kit: a wick, jar, double boiler, and a clean dry towel. To make colored candles, you will also need dyes and perfume. Be sure to buy lead-free wicks. For the jars, you can use recycled candle jars, mason jars, a glass jar from the kitchen, or even an old metal jar. You will also need something to stir the wax and hold the wick, such as a spoon, chopsticks. You can also use a clip or pencil to secure the wick to the candle holder. For Scented Candles, you can use your favorite essential oil or aromatherapy oil. For colored candles, you can buy dye chips or liquid. Scents and dyes can be found at most stores or candle suppliers.
3. Melting wax. Add about an inch (2.5 cm) of water to the bottom of the double boiler. On top of the double boiler, heat your wax over medium heat. If it is a large wax block, cut it into smaller pieces. Use the double boiler method to melt the wax, don't try to melt the wax faster at a higher temperature. Because wax has a low flash point, it is easy to catch fire. If you don't have a double boiler, you can place a large, heat-safe glass bowl over the metal pan and use it as the top of the double boiler.
4. Hard core. When the Wax Melts, grab the wick at the bottom and quickly pull the wick out of the wax. Straighten the wick and let the wax dry. This will keep the wick vertical, making it easier to place on the bottom of the candle jar.
5. Secure the wick in the jar. Dip the bottom of the wick in the wax, pull it out, and place the wick base on the bottom of the candle jar. Press down with the handle of a spoon and chopsticks until the wax is dry. Use clips, chopsticks, pencils in candle jars. If you are using clothespins, clamp the core to the center. If you use chopsticks, wrap the excess wick around the chopsticks to keep the chopsticks in place, straight, and centered.
6. Color the wax. Keep stirring the wax as it melts. While it continues to melt, cut your dye block or chips into small pieces. Depending on the amount and type of wax you use, consult the manufacturer for instructions on how much to use. Once all the wax is completely melted and becomes a clear liquid, remove it from the hot oven. Add the dye and stir until the dye is melted and evenly dispersed throughout the wax.
7. Add fragrance. Once your wax is out of heat and stained, let it cool for 20 to 30 minutes before pouring the candle or adding fragrance. This will prevent the wax from hitting the center of the candle, preventing the fragrance from burning off.
8. Pour out the candle. Pour the wax into the jar, making sure not to pour wax on the wick. Fill the jar, leaving about a quarter of an inch of space between the top of the wax and the rim of the jar. Wrap the jar in a clean towel. This will prevent the wax from cooling too quickly, preventing the candle from shrinking and cracking.
9. Finally finished.


Privacy statement: Your privacy is very important to Us. Our company promises not to disclose your personal information to any external company with out your explicit permission.

Fill in more information so that we can get in touch with you faster
Privacy statement: Your privacy is very important to Us. Our company promises not to disclose your personal information to any external company with out your explicit permission.